

Setting up a blog on your Thinkific site is straightforward with the help of BlogHandy. Once you've installed the BlogHandy Thinkific app via the Thinkific app store, follow the steps below to add a blog to your Thinkific site and start blogging.
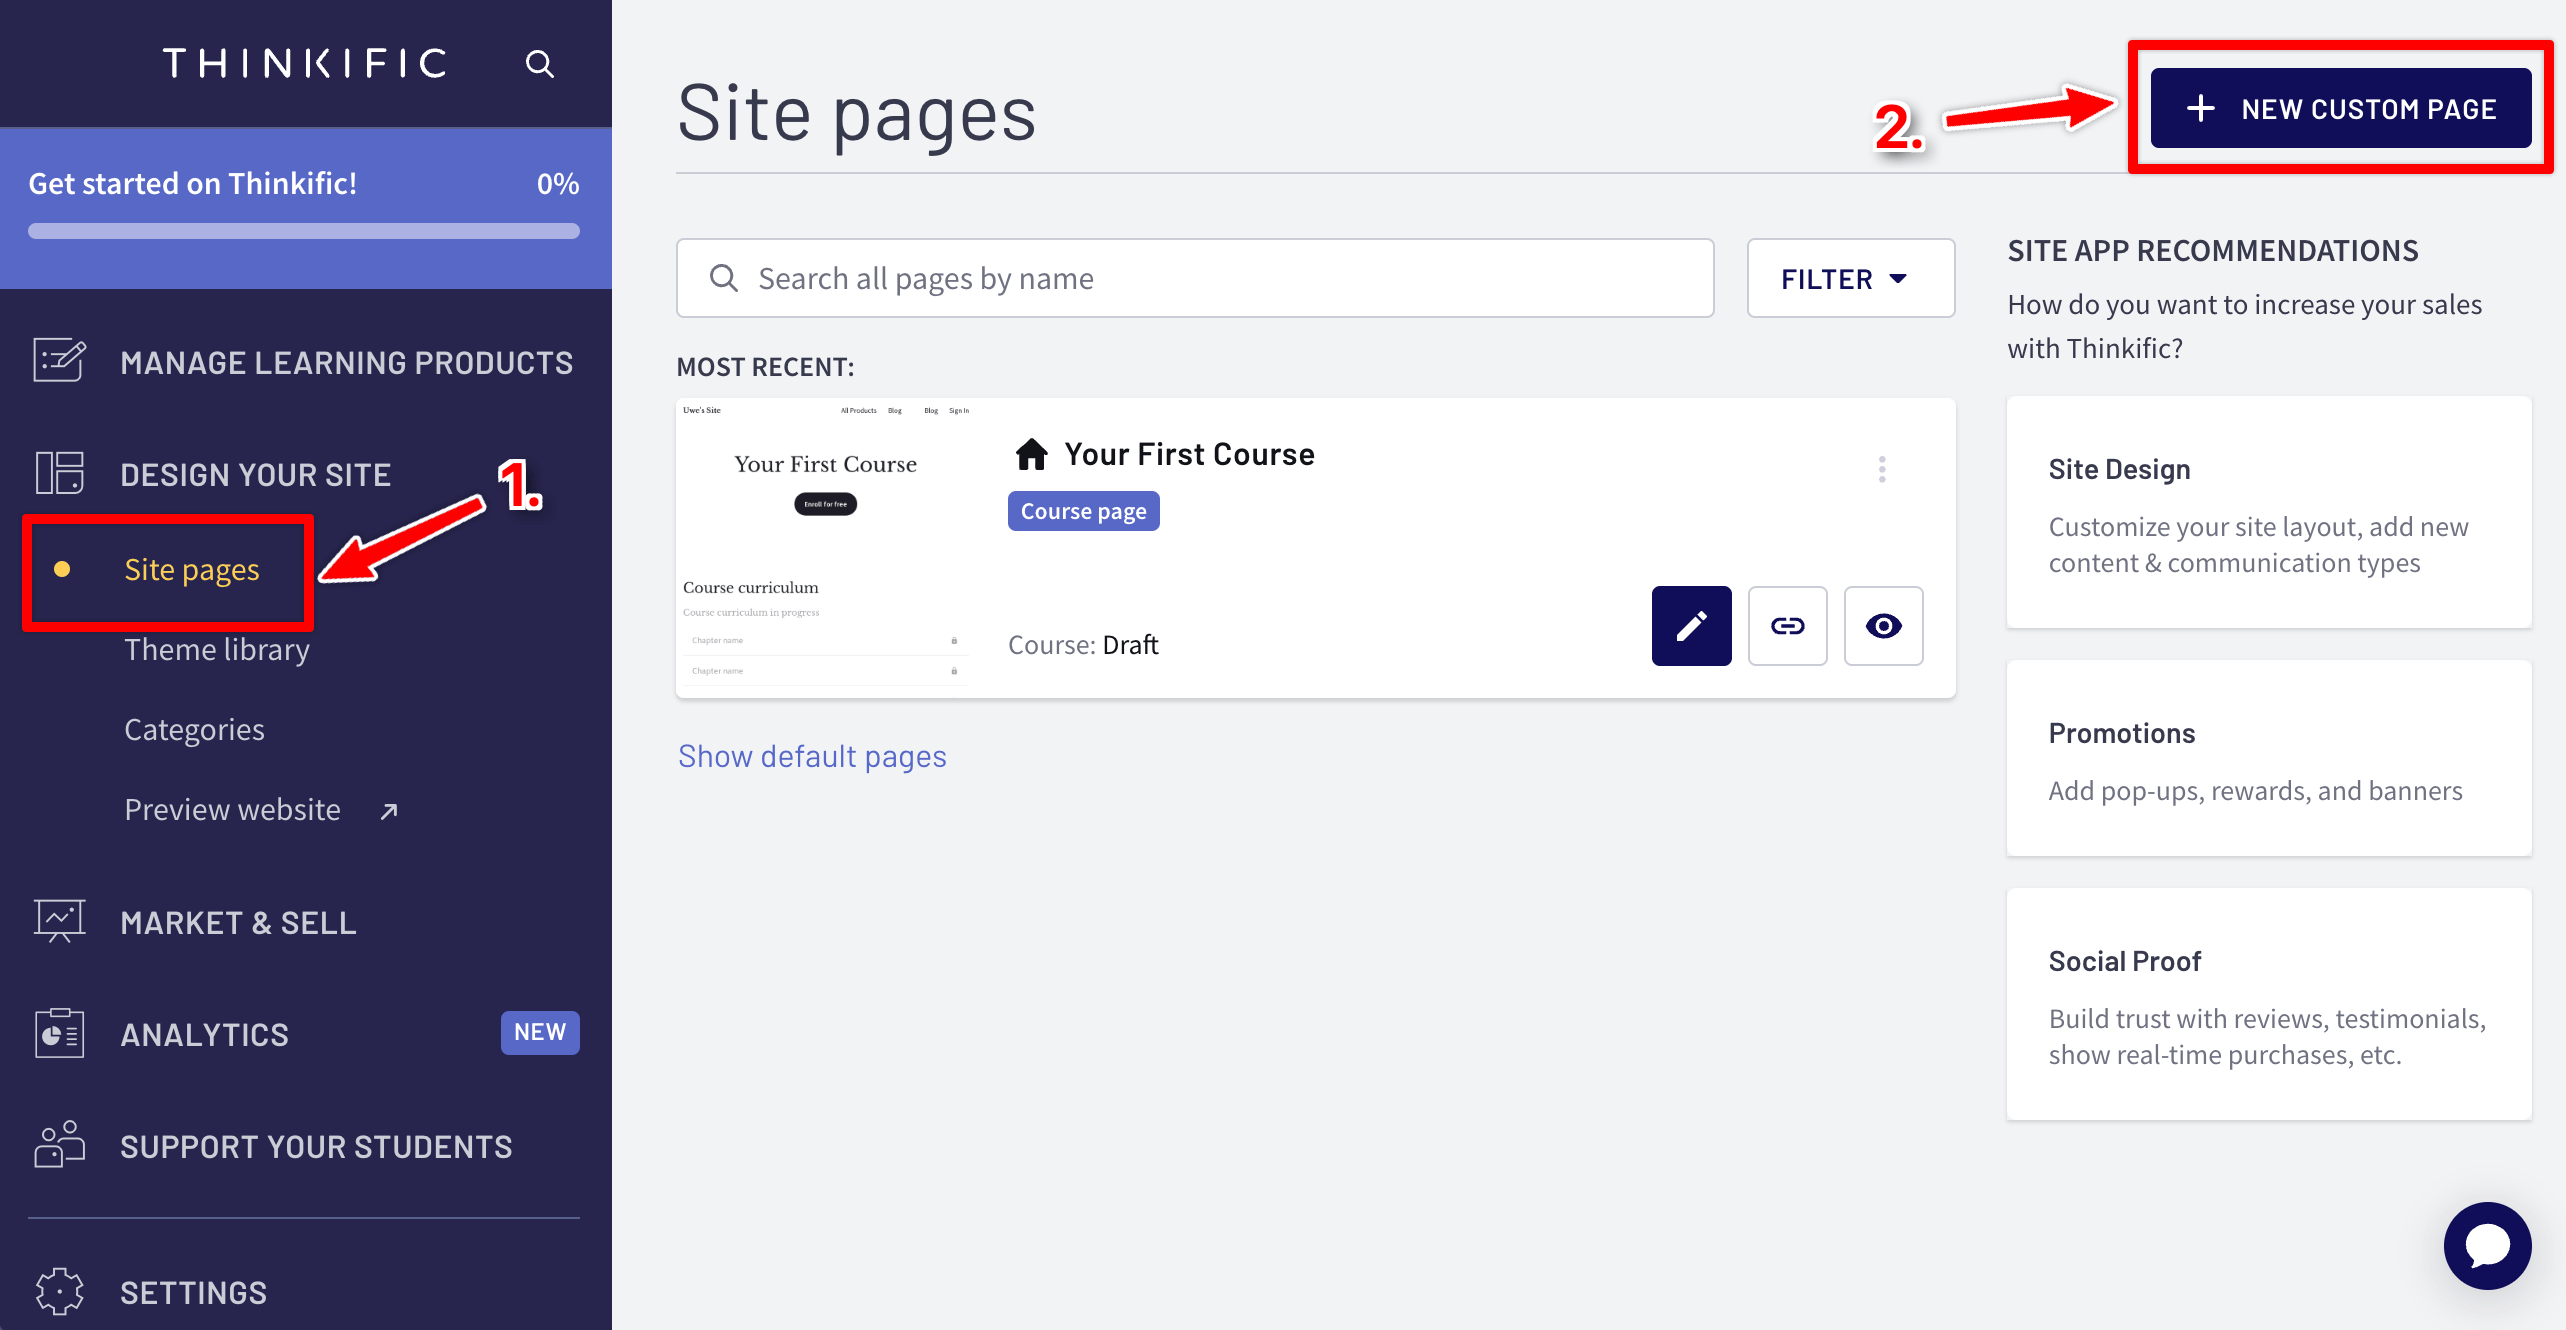
1. You'll need to create a new page where visitors can find the blog. Under the DESIGN YOUR SITE menu, go to the Site pages and click on the NEW CUSTOM PAGE button
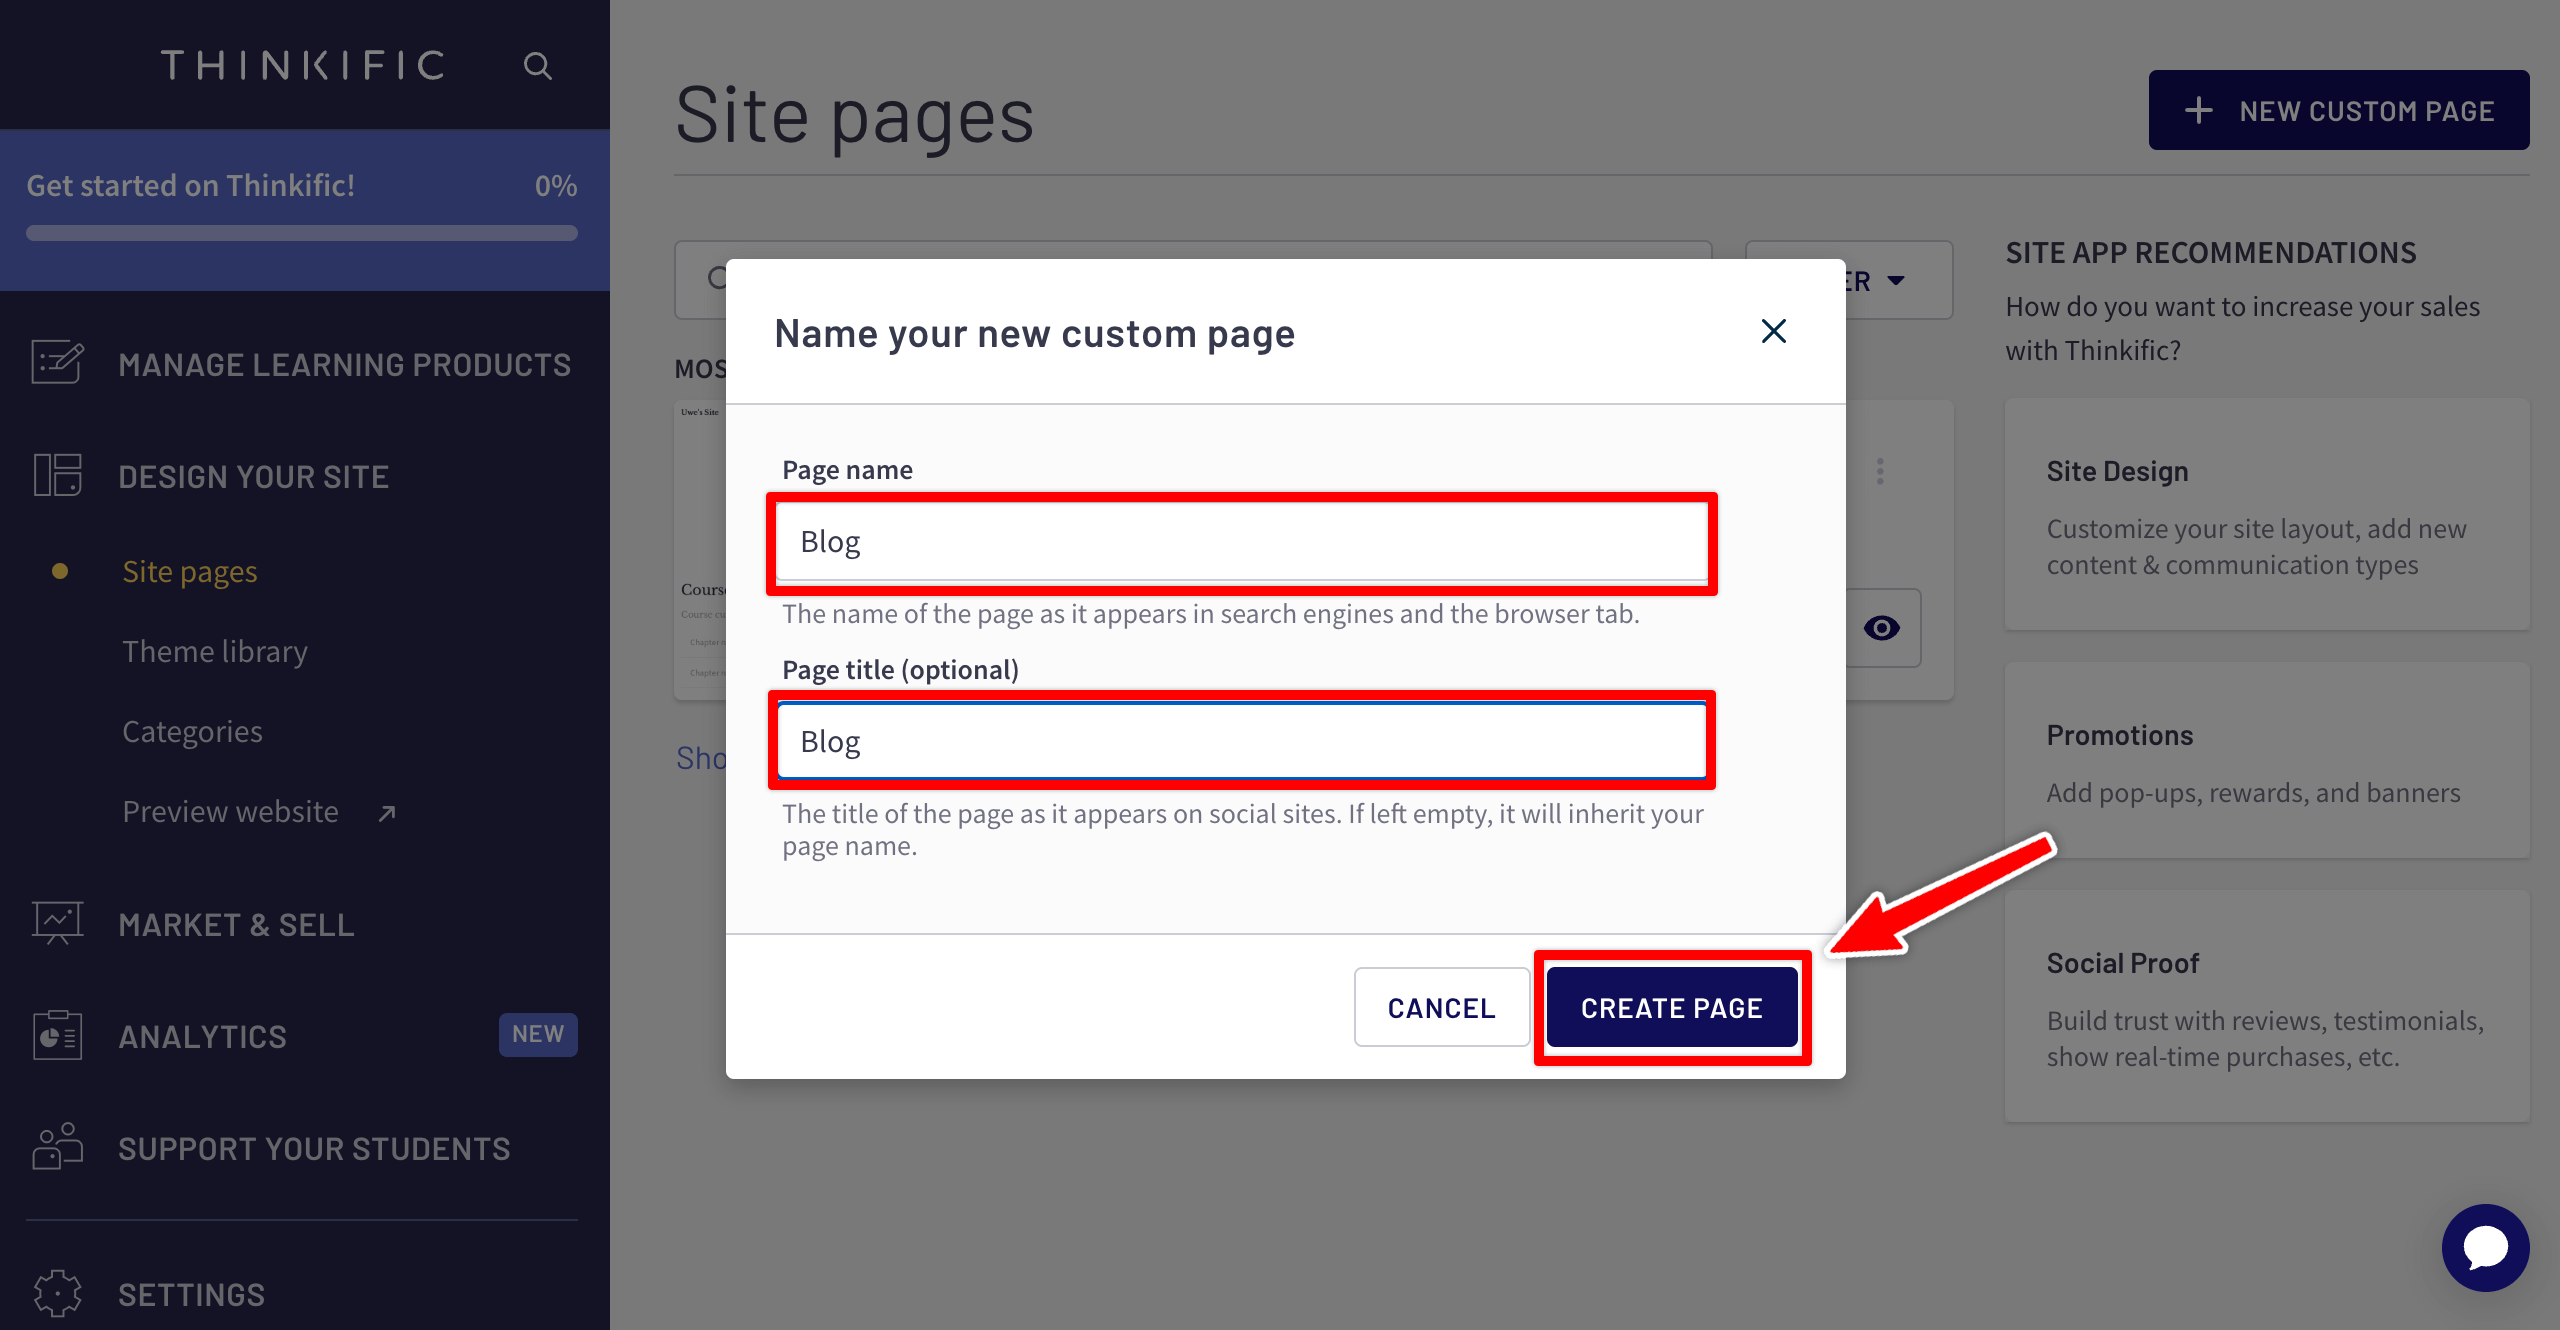
2. Give your new page a name and title when the popup appears. Then click on CREATE PAGE.
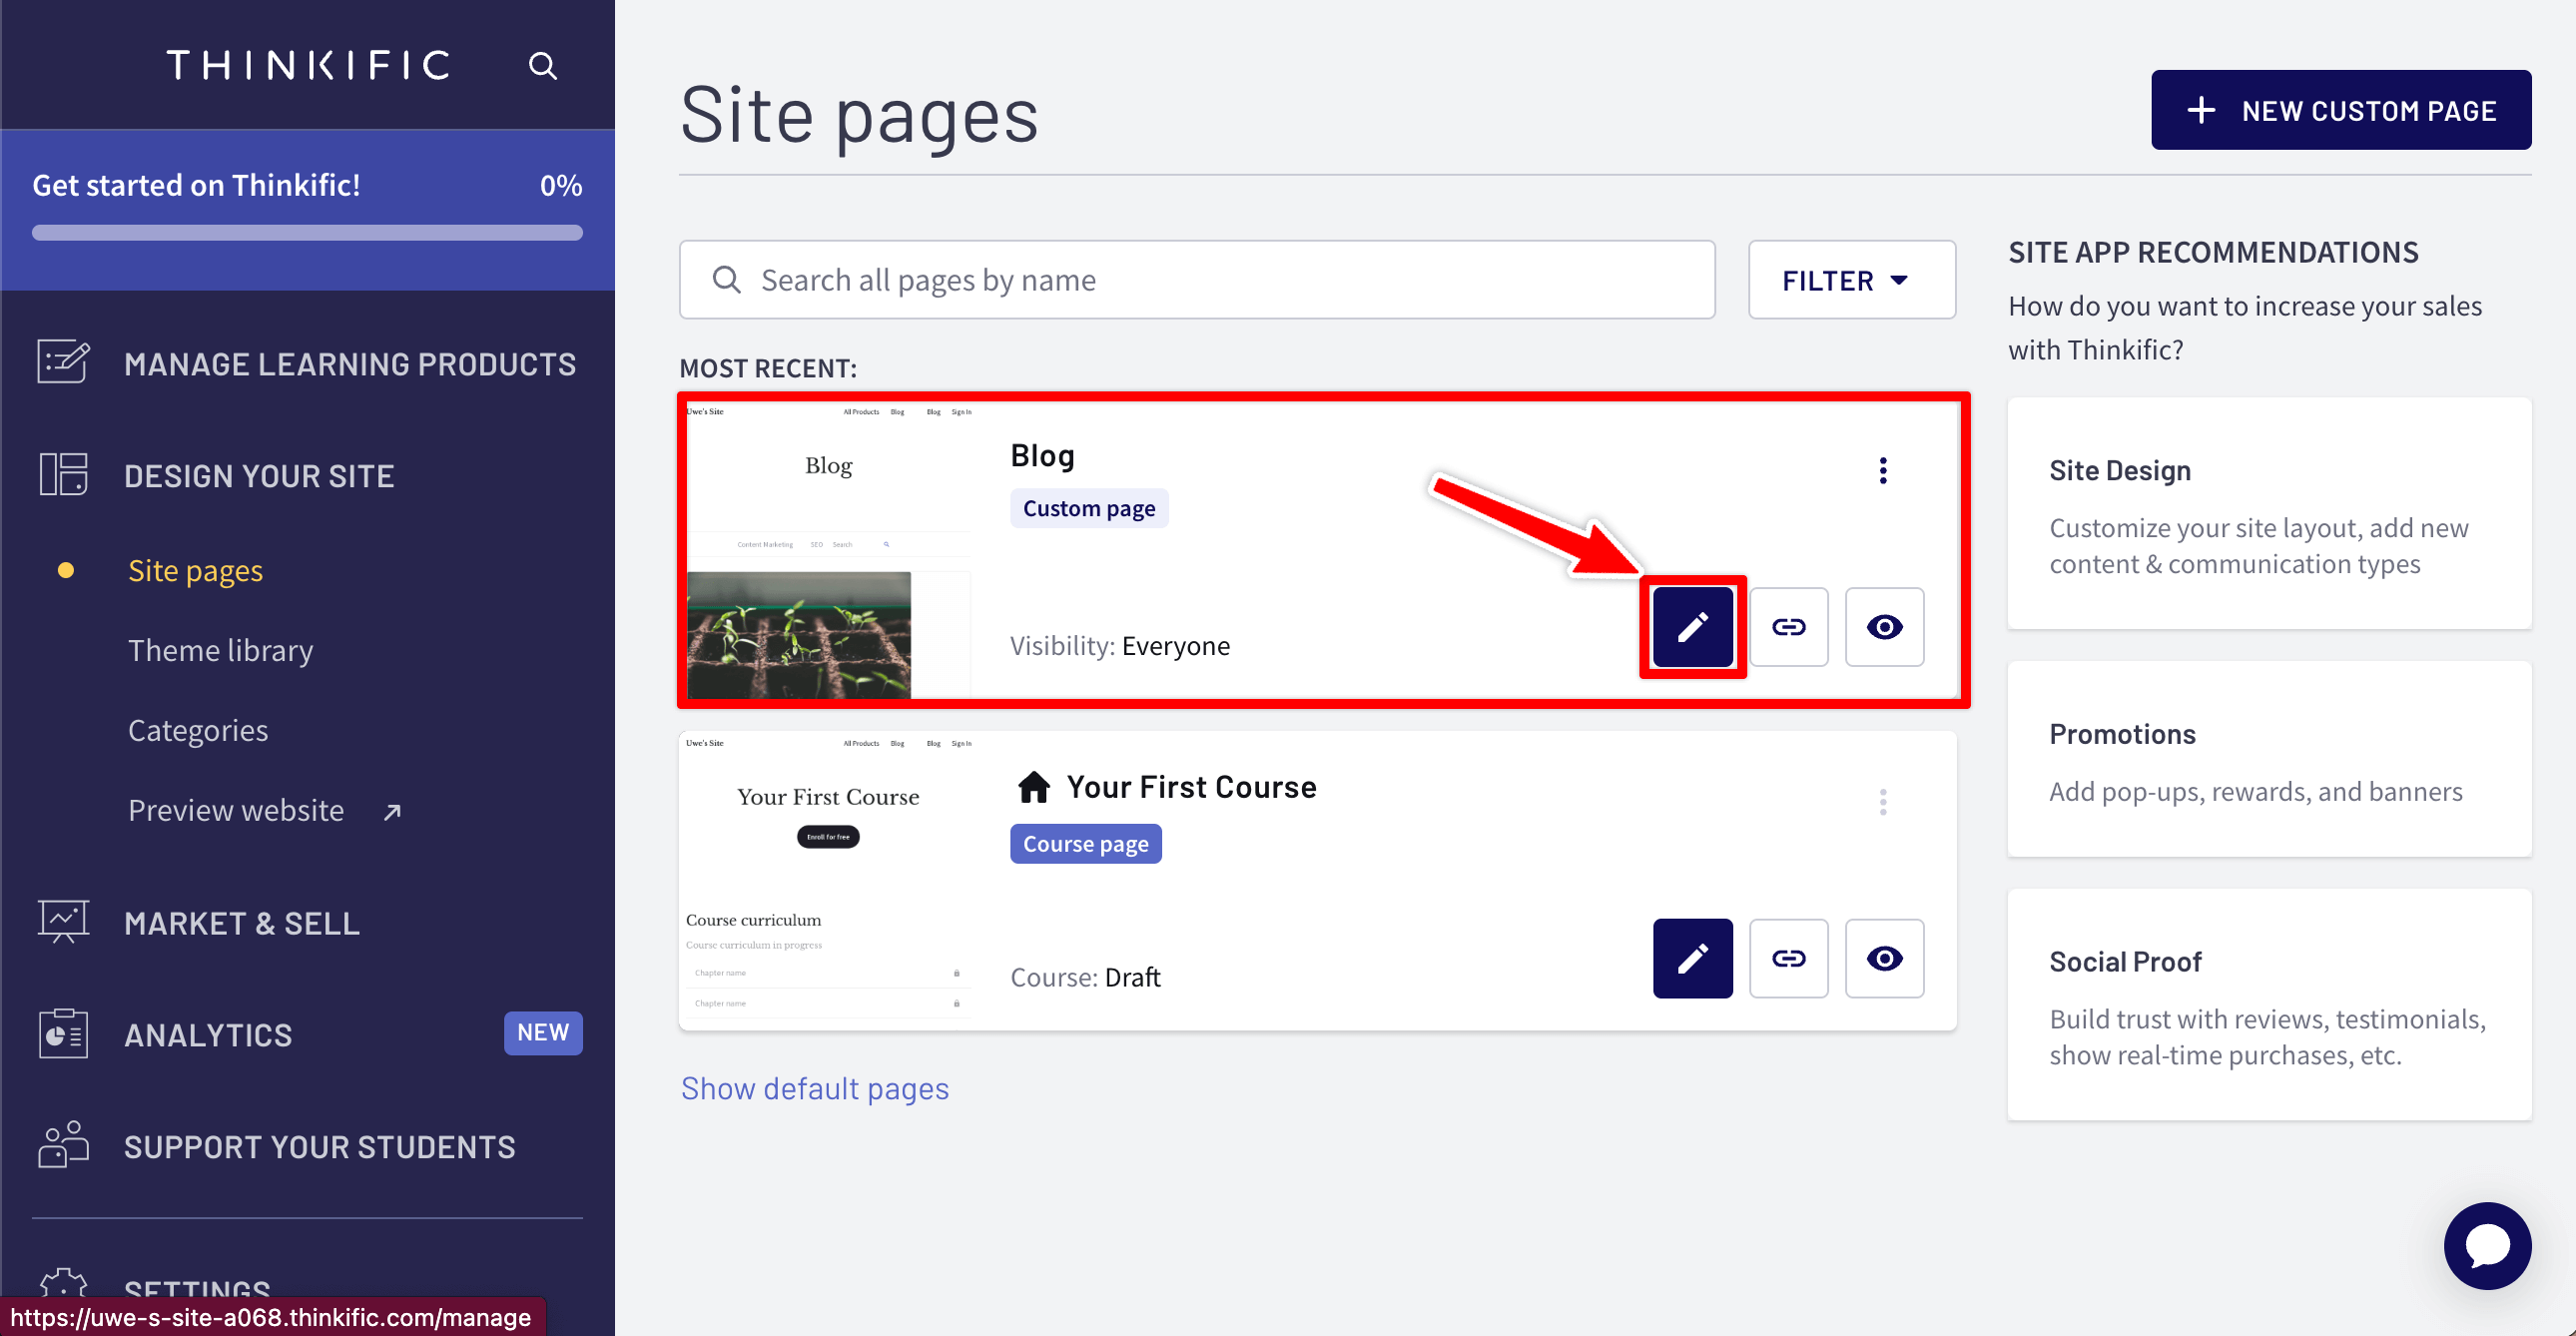
3. You should now see the newly created Blog page on the Site pages page. Click on the pencil icon to edit the new page.
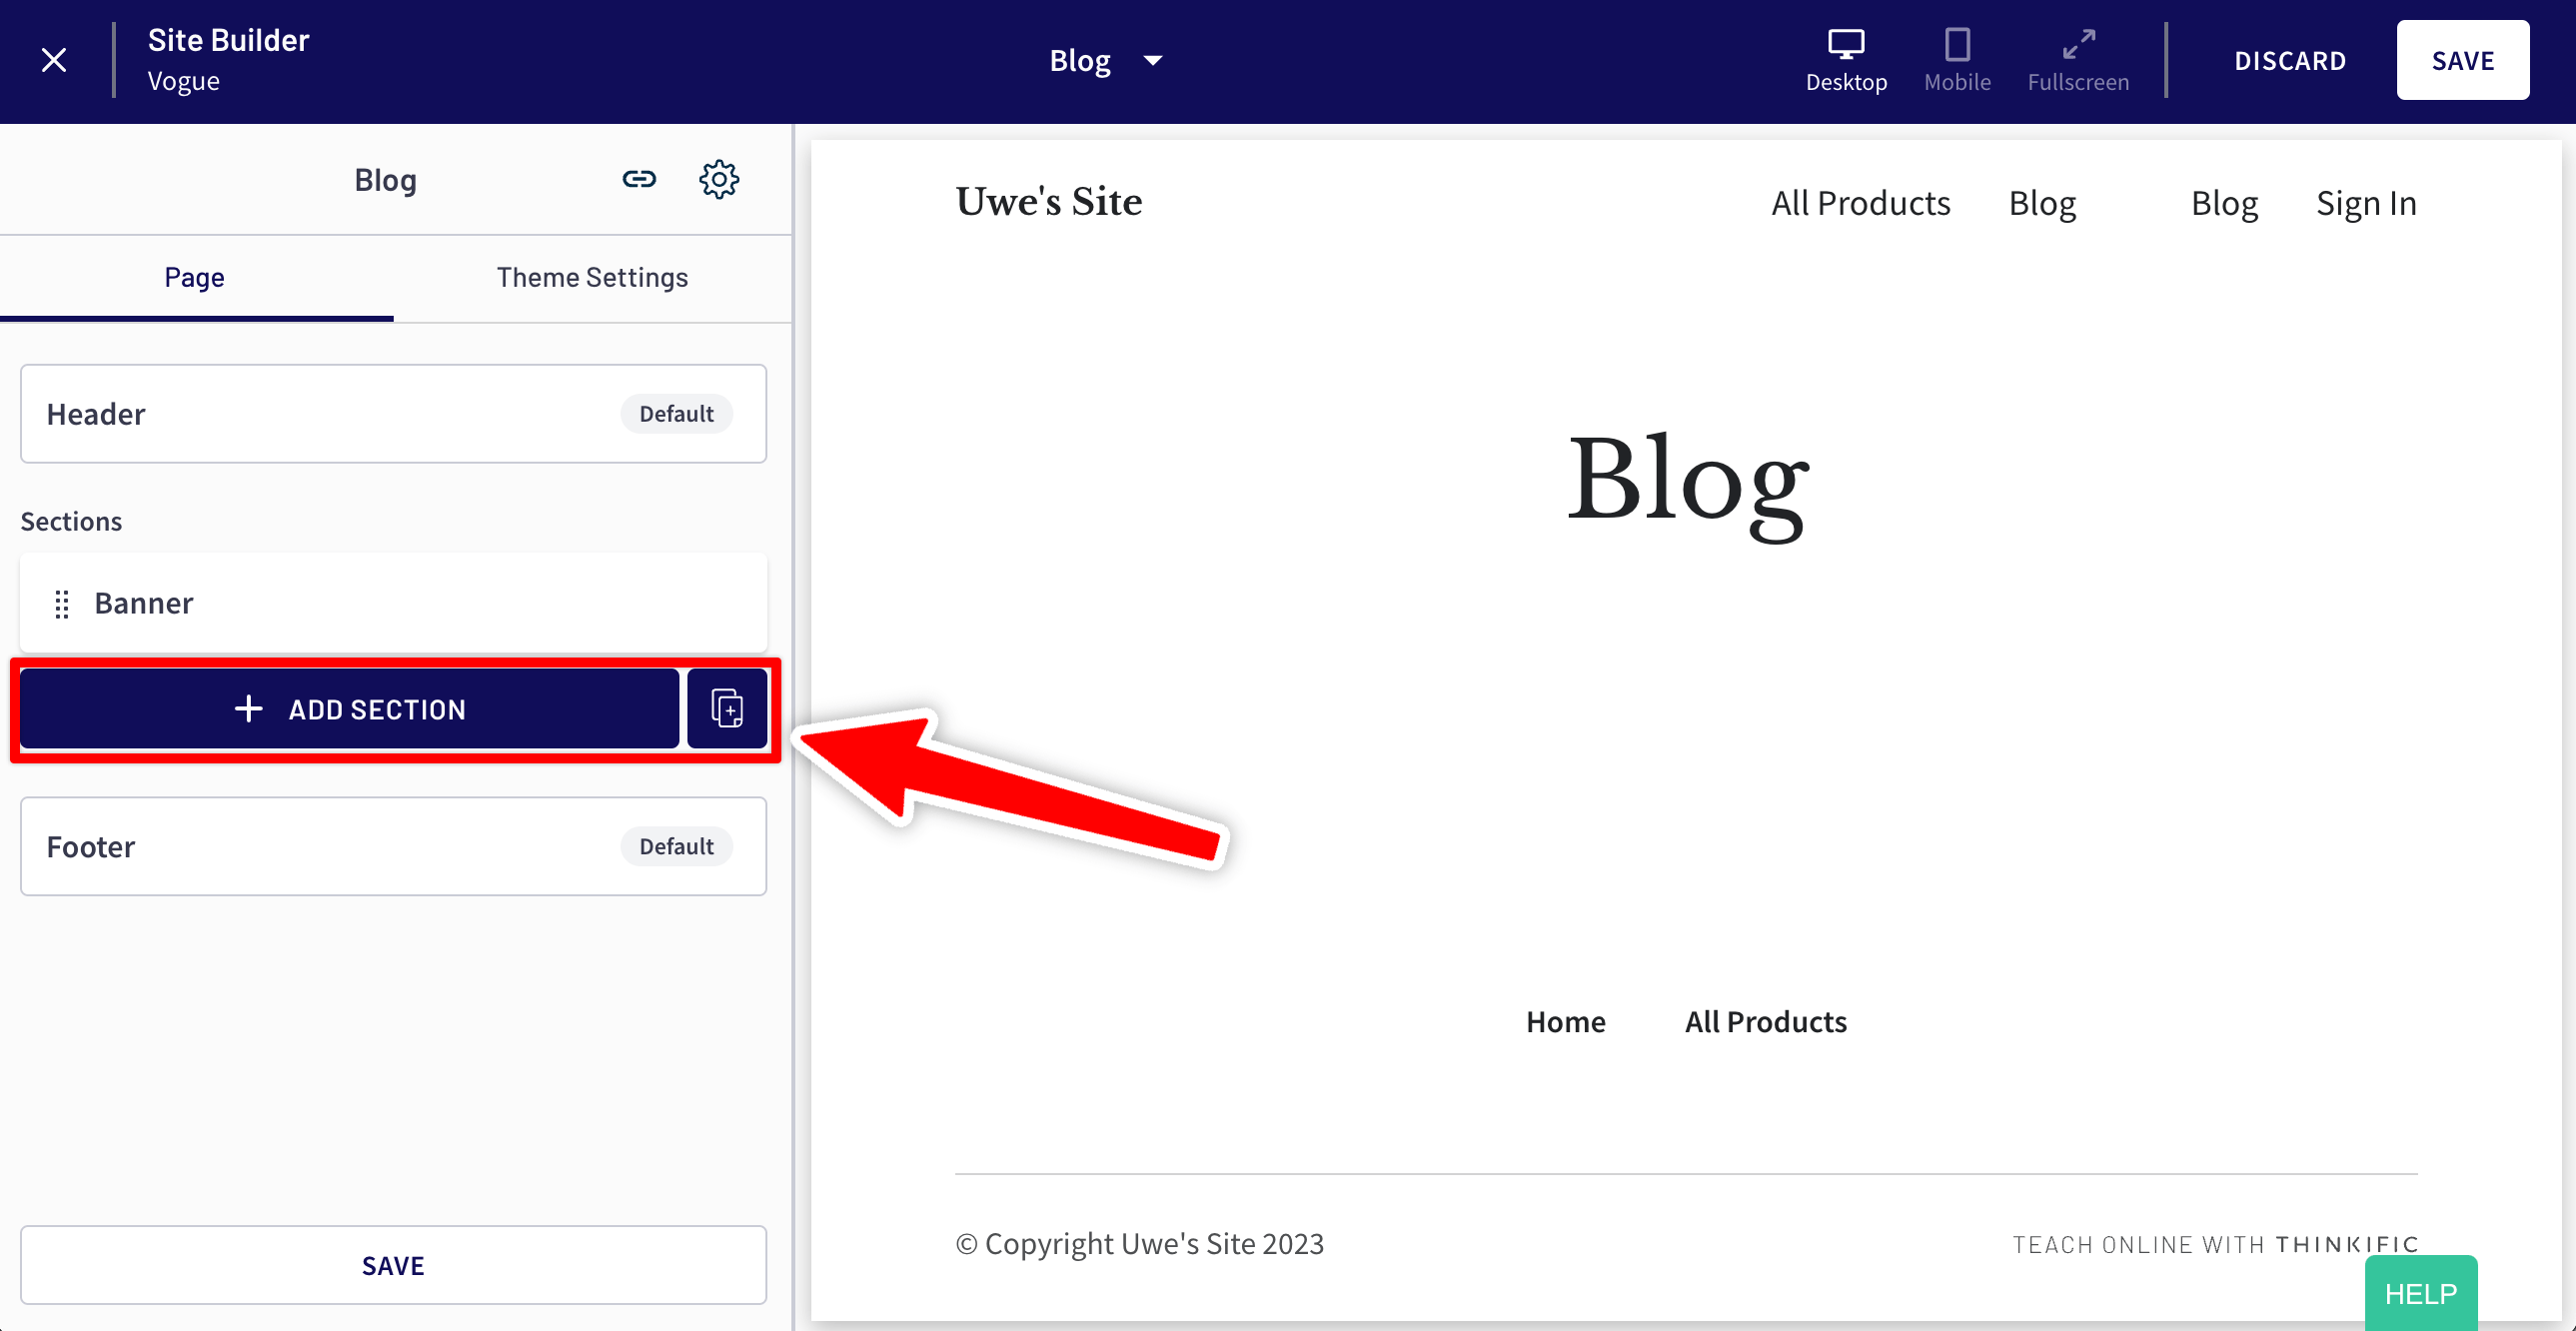
4. Adjust the new page according to your wishes, and when you're ready to add the blog, click the ADD SECTION button.
5. In the popup, scroll all the way down to find the BLOGHANDY section and click on it.
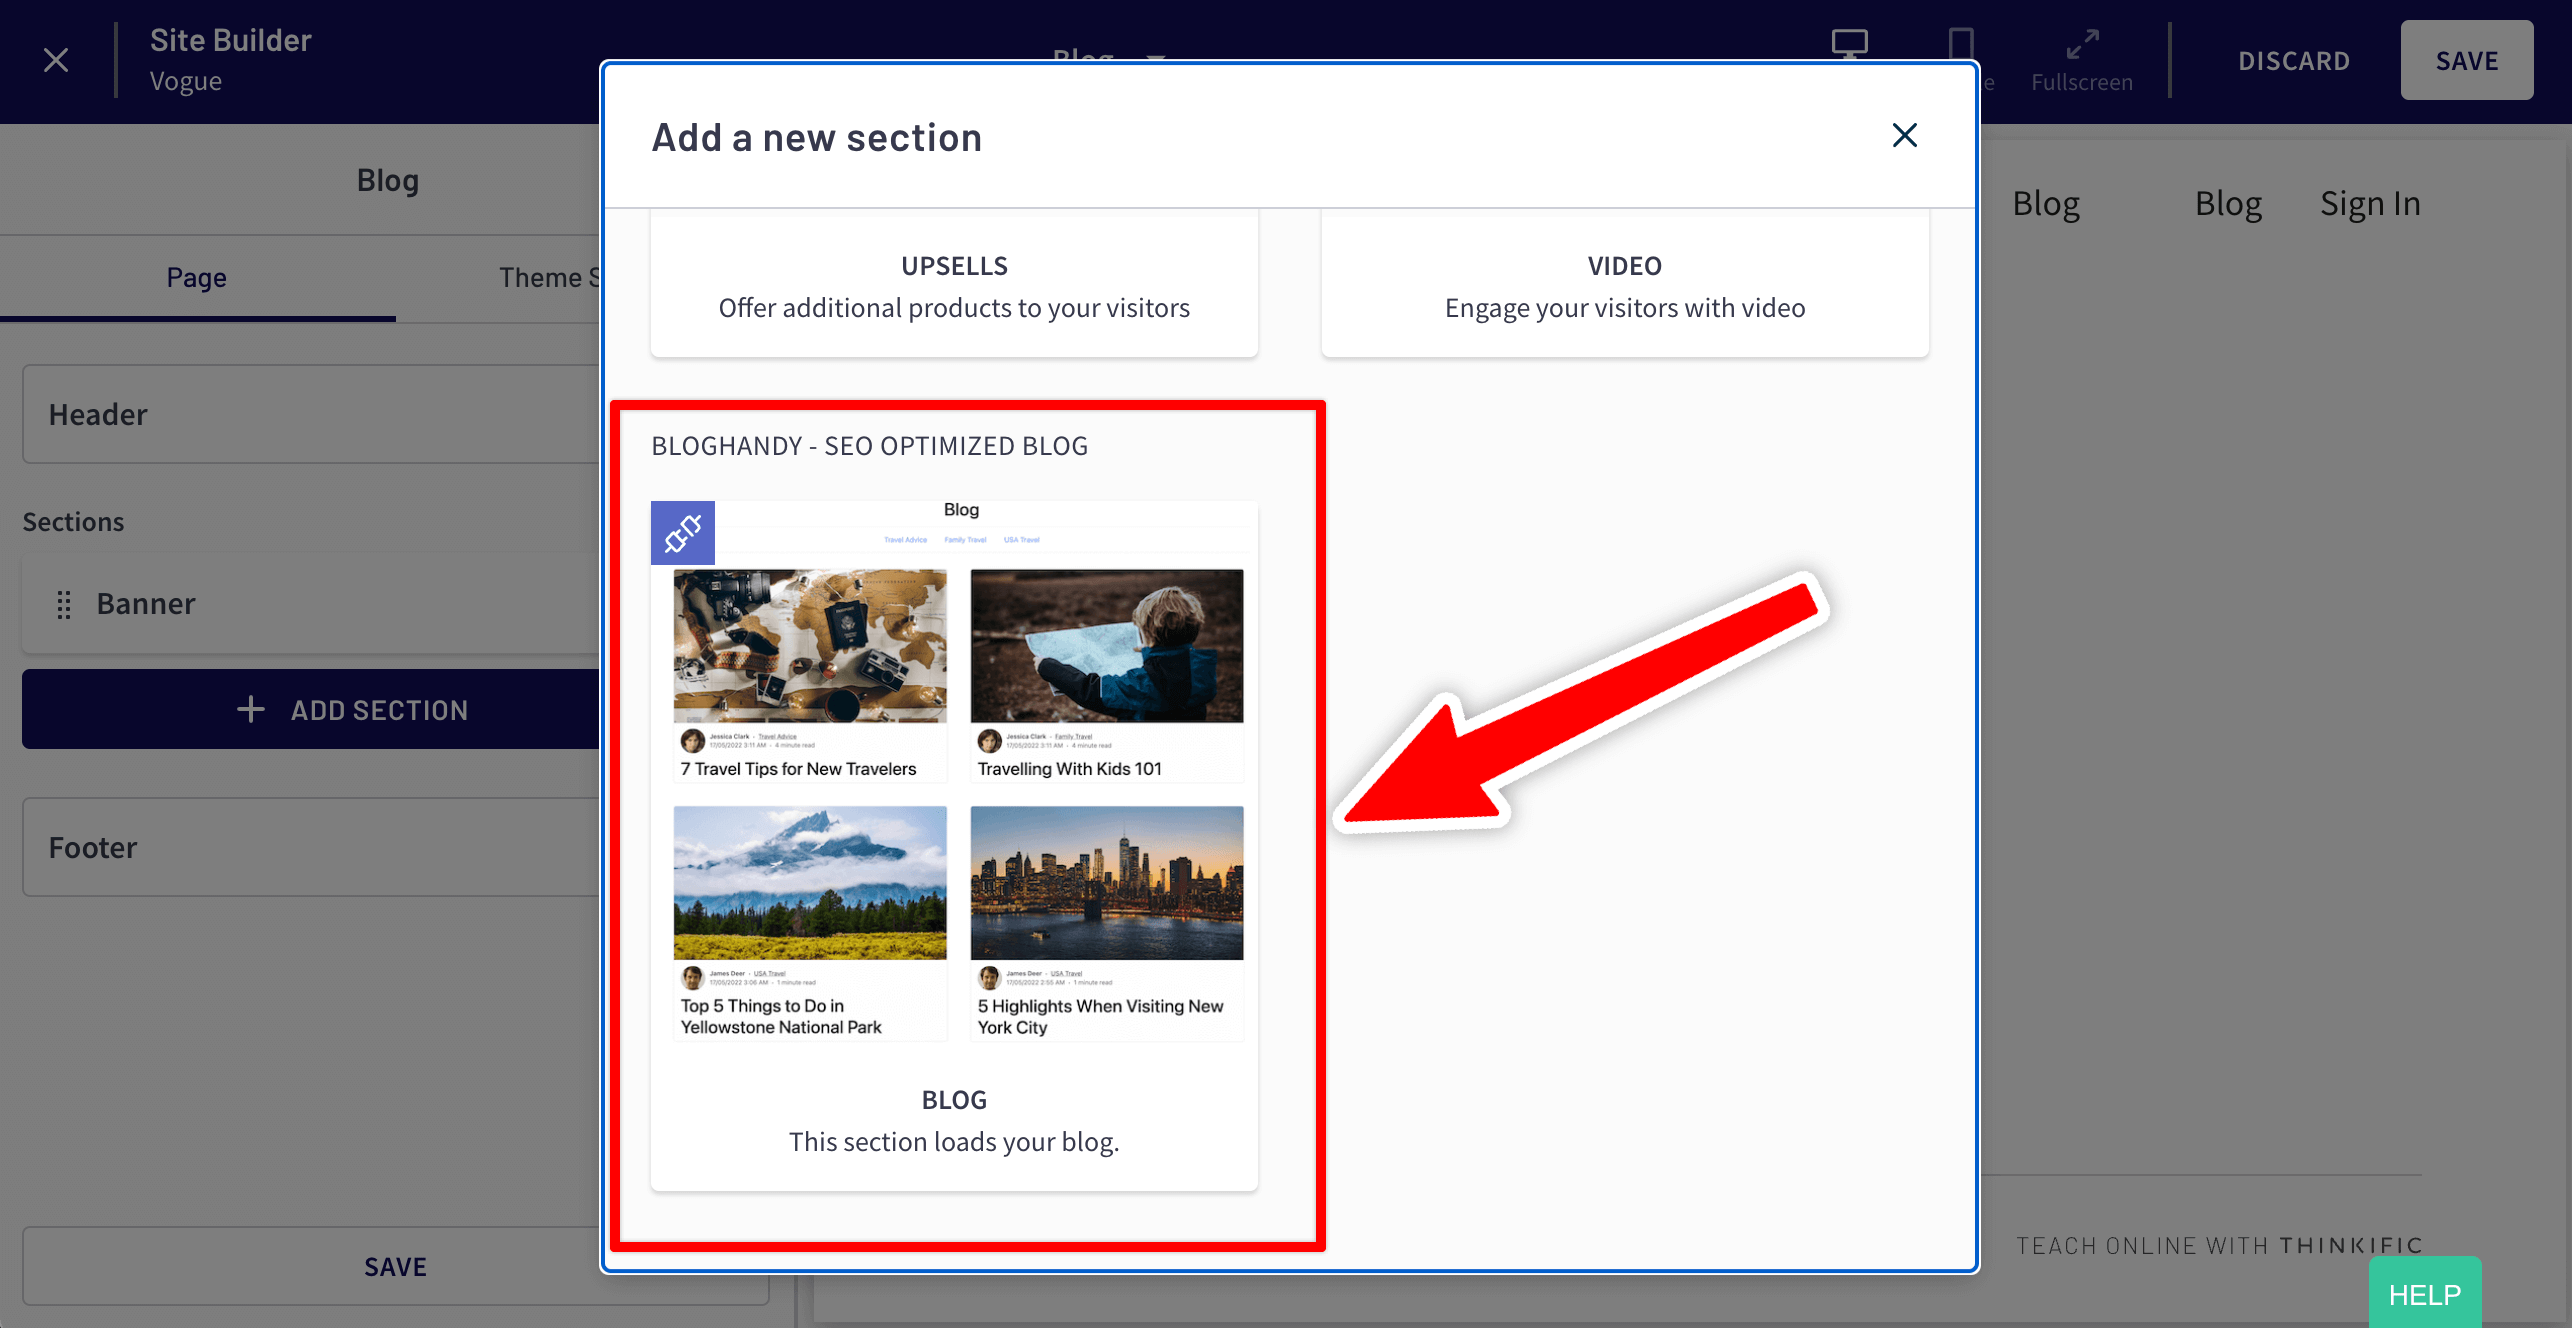
6. Congrats! 🎉 The blog has been added to your Thinkific site, and you can now start adding blog posts via the BlogHandy interface.
Below, you can see what the blog looks like on our demo Thinkific site.

More resources:
- Check out this guide if you want to add your blog to your Thinkific site's header menu
- Learn how to access your BlogHandy account to write new blog posts, add categories and authors and change settings